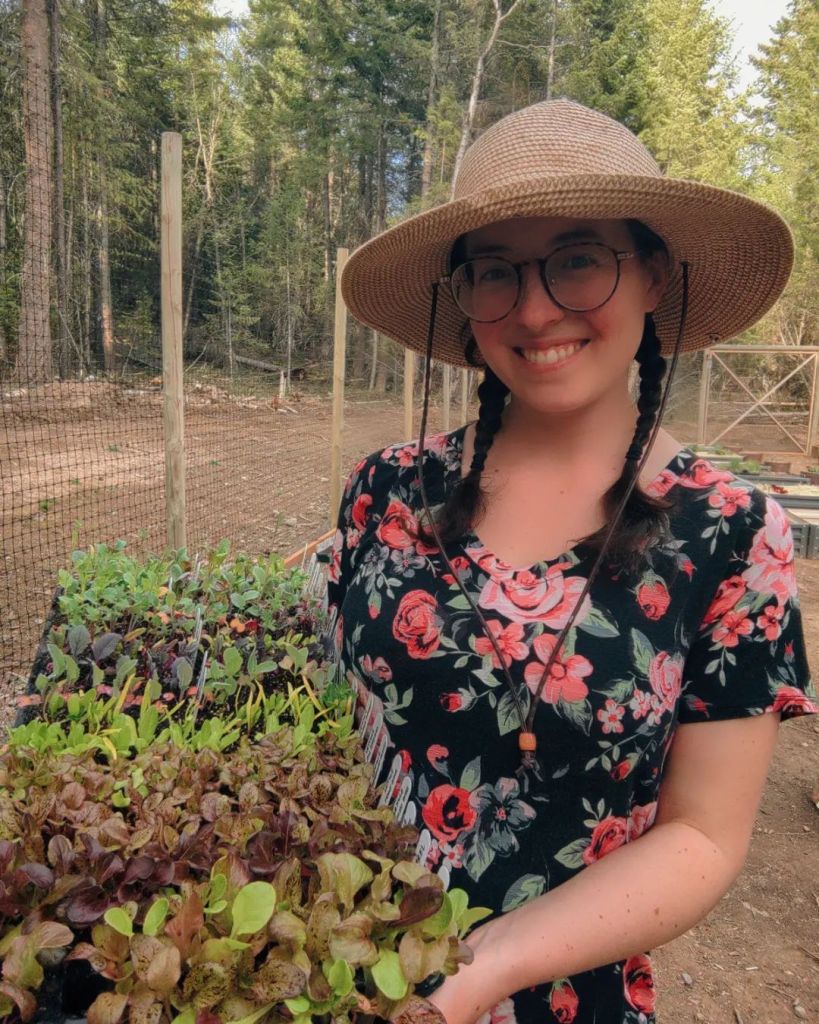
Homestead Diary: The Heritage Apple Project

Over the last few years I have been building a generous collection of foraged apple seeds. I have a tradition of sprouting these seeds as early as New Year’s as a totally gratuitous mid-winter gardening activity. The first couple of years I only collected a handful of varieties, but over this last summer my little experiment turned into a full-on project. Here I’ll share the findings I’ve gathered on the topic of actually sprouting the apple seeds and the exciting (or disappointing) results I’ve gotten.

Over the last few years I have been building a generous collection of foraged apple seeds. I have a tradition of sprouting these seeds as early as New Year’s as a totally gratuitous mid-winter gardening activity. The first couple of years I only collected a handful of varieties, but over this last summer my little experiment turned into a full-on project. Here I’ll share the findings I’ve gathered on the topic of actually sprouting the apple seeds and the exciting (or disappointing) results I’ve gotten.

First of all, if you’re here to tell me what a waste it is to start an apple tree from seed, you may kindly take your leave. I don’t need that kind of negativity in my life! But in all seriousness, this has been surprisingly enjoyable little hobby that gives me something gardening-related to look forward to after the mania of the holidays is over and the relative boredom of the dead of winter creeps in – along with the sub-zero temperatures.

However, there are some things that should be noted about the particular type of apples I look for as sprouting material and why it’s different than those viral videos you see about propagating a supermarket apple, which I would never do for numerous reasons.

Apples often don’t come true to type via seed

Image courtesy of ResearchGate

Generally speaking, most apples won’t come true to seed. That means anything you get from the supermarket won’t grow into the same type of apple that it came from. Now why would that be?

Most commercial fruit, even if it’s from a local farmer’s market, will be from cultivars (or varieties) that are hybridized for production or disease resistance, among other things. This doesn’t mean that they’re GMO, but what it does mean is that any offspring from that fruit will likely revert to its original parentage and not be a viable seedling; that or it won’t produce desirable fruit. And given that it can take up to 7 years for an apple tree grown from seed to start producing it’s probably a good idea to choose types that will be as advertised! Surprisingly enough, more than 17,000 varieties of apples have been grown in the US, although less than 3,000 of them still exist today.

Apples have been part of the human experience since the beginning of human history. Apples have been found as a part of the diet of early humans in anthropological research and recorded in the story of Adam & Eve. Greek and Roman mythology refer to apples as symbols of love and beauty. And when the Romans conquered England about the first century B.C.E., they brought apples with them.

In the 1600s, apples made their way to North America, too. Crabapples preceded European colonists to America, but the fruit was not very edible. The Massachusetts Bay Colony requested seeds and cuttings from England, which were brought over on subsequent voyages to Boston. Other Europeans brought apple stock to Virginia and the Southwest, and a Massachusetts man, John Chapman, became famous for planting trees throughout Ohio, Indiana, and Illinois. You might know him by his nickname, “Johnny Appleseed.”

As the United States and Canada were settled, nearly every farm grew some apples. Although some of these apples were very good for eating and cooking, most of the early varieties would be considered poor quality today. Often, they were used for cider, and the ground-up apples were fed to livestock.

The Vermont Tree Grower’s Association, vermontapples.org

Apples in the State of Idaho

Apples have a very rich history here in my own state of Idaho. In the late 1800s, Idaho pioneered the production and preservation of apple varieties imported from the Eastern territories. The first commercial orchard of the Northwest was opened in modern-day Lewiston, Idaho in 1863 at a respectable size of 15 acres, and produced pears as well as apples which were sold to nearby workers in mining camps. The town was to become known as Lewiston Orchards and remained a top agricultural center for many decades, until fruit production moved further downstate. It remains a focus of Idaho’s economy even today: apples are the state’s top fruit export.

It could easily be said that every farm and homestead in the 19th and 20th century grew some kind of apples. This elusive and somewhat mysterious local lore has inspired many to dive deeper into the discovery and preservation of antique or historic varieties, and groups such as the Idaho State Horticultural Society and the Idaho Apple Commission have made it their duty to manage and preserve the culture of apples in our great state. There are many other smaller projects, like the orchard at the Sandpoint Organic Agricultural Center, among others, that focus on gathering details on historical varieties and cultivating them for the public’s enjoyment.

The Apple That Started It All

“Sheena’s Pippin,” until further identified

My interest was at first piqued by a tree owned by a good friend of mine who invited me to pick from it when we first moved onto our homestead. Being a generational naturalist I immediately noticed its unkempt, naturalized splendor, as well as one very important detail: the tree was grown completely on its own root-stock, ungrafted. This is pretty impressive and quite a curiosity in the scheme of orcharding things, so I took to the internet to try and identify it. There are many varieties common to the area that may have even been cultivated by the university itself, dating back to the 1960’s; this particular tree produces absolutely beautiful freckled fruit, streaked with red and accented by a sunny yellow blush. Knowing I would absolutely need to have my own, I saved some seeds and successfully sprouted about a dozen trees the following winter, two of which now reside at my parents’ home in the Clearwater River Valley.

My parents’ area is also rich in apple history, being nearby the valleys of Lewiston Orchards fame; and in their neighborhood there are many wild, ungrafted apple trees to be studied and propagated free of charge. We became so interested in all the varying types of apples in the area that I amassed a collection of seeds and kept detailed notes of each variety for future reference. After the first year, however, my success at actually sprouting the seeds was fleeting.

Gathering Apple Seeds

Removing apple seeds intact is an art form

To harvest apple seeds I will usually look for specimens that are as bug- and blemish-free as possible. This will ensure the highest amount of viable seed per apple. I then slice the meat away from the core, and usually taste-test it and take notes of its characteristics. Don’t forget to take pictures of each variety if at all possible! This will help a lot with identification in the future.

Using a sharp knife I will carefully score a circle around the waist of the apple core, which is all that is left after slicing away the usable fruit. Then, grasping either end in each hand, snap the core at the score mark, exposing the seeds within the woody part of the core. I carefully pluck these seeds out and place them on a labeled paper plate to dry out for a week or so, then into a plastic bag for storage. Discard any seeds that have holes in them or seem hollow; they probably are not viable. You can use the apple cores, peels and other cutoff for making apple cider vinegar, or compost the remaining waste.

Germinating Apple Seeds

The first year that I tried sprouting seeds I had great success. I just had the one variety from Sheena’s yard, and I put them into the fridge wrapped in a damp paper towel, sealed in a baggie – and completely forgot about them. Three months later I spotted them in the fridge and not only had they stratified, they had germinated! I was so excited I could hardly contain myself. I put about a dozen sproutlings into cell trays and nursed them for months before they were about four inches tall. Unfortunately my cat had the great idea to take the tops off of nearly all of them; I sent the remaining survivors to live at my mom’s in relative safety. My two cats have a bad habit of damaging my seedlings and other plants, and to my bitter chagrin, I have none of these first flush of apple trees for myself.

The next year I tried winter sowing the seeds I had gathered in milk jugs and had very little success with this method. All the growing conditions seemed right but out of the 50 or so seeds I planted, 2 came up. These two seedlings are wintering over at my mom’s, buried in their pots waiting to be transplanted this year, their second summer.

So this year I did some more research and came up with the same methods that I had read about before: cold stratifying in the fridge with either damp paper towels or peat moss, then waiting for them to sprout in storage or planting them after a 4-6 week chilling period. I opted to try both and got some really interesting results. As of right now, six weeks after placing them in cold storage, none have sprouted. I pulled one package and did some testing and they did germinate after being removed from the refrigerator, so I pulled all of my paper towel specimens and planted them in a 200-cell 1020 plug tray to germinate. One variety that I had a good number of got split off from the group and were broadcast sown into a 4″ tray to germinate under light, with no heat. The remaining 200 seeds I planted I placed onto a heat mat to try and aid germination. Rather than covering them with soil I covered with vermiculite to see if they will retain moisture a little better. I still have some dried seeds of each variety but this will be the largest test run of this year’s seed stock.

Apple seeds will usually have a germination rate of about 30%, so while this may seem like more trees than anyone would know what to do with, I will be lucky to get 50 seedlings sprouted, and then they will have to survive many other obstacles beyond that, including hardening off, wintering over, and planting out, a two- to three-year process. I am hoping to have a good variety of about 20 trees planted around our property and hopefully have some to share with others. I will update this post at the beginning of summer with the results of the 2023 planting-out.


The particular varieties I have gathered won’t mean anything to you, unless you’d like to try sprouting some in which case I’d be happy to share. Here are the varieties I currently have in my collection.

Sheena’s Red Pippin: Sagle, ID. From a friend’s apple tree that I have picked from since 2018. Late summer/early fall apple; yellow with a deep red blush and striping when ripe; soft flesh suitable for fresh eating and applesauce; does not preserve well. Great potential for cider.

Horse Apple: Kamiah, ID. From a horse pasture on Woodland Rd. Late fall/early winter apple; turns deep red and freckled when ripe; soft flesh suitable for fresh eating and applesauce. Will test potential for cider.

Pie Apple: Woodland, ID. Acquired during the 2022 Fall Festival apple pressing. Late summer/early fall apple; green with a red blush when fully ripe; firm flesh, tart and full of pectin. Great potential for baking, canning and preserving. Would store well.

Million Dollar Property Apple: Kamiah, ID. Taken from ground fall of a roadside apple tree outside of a ranch that was sold for nearly $1,000,000. Late fall/early winter apple; red when fully ripened; form flesh is scrisp and slightly tart; more like a crabapple. Very few seeds gathered.

Pink Lady: Woodland, ID. Collected during the 2022 Fall Festival apple pressing. Late summer/early fall; yellow with a pink blush, freckled when ripe; crisp, juicy, sweet table apple. Not sure of storage or cooking qualities. Few seeds collected.

Pond Apple: Kamiah, ID. Collected apples and seeds from this tree for two years – 2021 and 2022. Located near a public fishing pond, hence the name. Fall apple; somewhere between a Golden Delicious and Granny Smith, the flesh is slightly soft but still very crisp and juicy. Has amazing flavor. Best fresh pie apple I have foraged so far; yellow-green with a slight red blush and freckling when ripe; wouldn’t store well, but would be a good candidate for pressing.

Pappy Smith: Woodland, ID. Picked from Fred’s property during the Fall Festival of 2022; late summer,early fall apple; firm, tart, juicy green apple with lots of pectin, like a Granny Smith. Good for baking and storage.

Honeycrisp”: Woodland, ID. From Fred’s property, picked during the Fall Festival 2022. Late summer/early fall apple. He said they were a honeycrisp, and were of similar characteristics, although the tree was not grafted. Few seeds collected.

Green Apple: Possibly a duplicate of Pappy Smith; same characteristics, no red blush but could have been earlier in development. Acquired during the 2022 Fall Festival apple pressing.

Ott’s Basin Crabapple: Sagle, ID. Collected with owner’s permission from a roadside tree in my travels for raw milk. Green crabapple type with a red blush. Very tart and unpalatable but the tree wasn’t grafted or property cared for.

Cherry Lane Apple: Troy, ID. Collected from ground fall a roadside tree in a rural residential area between our house and Mom’s. Fall apple; eye-catching yellow apples almost overtaken by red blush; softer flesh, like a pippin, wouldn’t store well but would make great sauce and cider.

Celestial Apple: Kamiah, ID. Collected from a tree on public property that I used to pick from every year for Thanksgiving mulled cider, but was banished from picking by the neighbor for whatever reason after the fourth year. Late fall/early winter apple; a nice green apple with a red blush and smooth, shiny skin; good for cider and pies. Makes amazing canned pie filling.


Have you ever tried to start an apple tree from seed? Would you like to swap some seeds? Let me know in the comments!

Where to Get My Favorite Free Seed Catalogs

In the colder months when the wind blows snow flurries over our lifeless garden and the fire burns cozy in the living room, one of the most anticipated events in my house is the mid-winter arrival of the annual seed catalogs. There are few things more comforting than relaxing on the couch with a colorful magazine full of page after page of beautiful vegetables, flowers and herbs. Even though I rarely purchase from more than one or two companies every year it’s a wonderfully cathartic way to ward off the chilly weather.

In the colder months when the wind blows snow flurries over our lifeless garden and the fire burns cozy in the living room one of the most anticipated events in my home is the mid-winter arrival of the annual seed catalogs. There are few things more comforting than relaxing on the couch with a colorful magazine full of page after page of beautiful vegetables, flowers and herbs. Even though I rarely purchase from more than one or two companies every year it’s a wonderfully cathartic way to ward off the chilly weather.

There is an undeniable joy that comes from leafing through an old-fashioned ink and paper catalog; however, I know that there’s a lot of benefit to shopping online, including the ability to use advanced product filters and check out quickly. Two of my favorite storefronts that provide amazing selections online but don’t offer a paper catalog are True Leaf Market and Renee’s Garden Seeds. I have ordered from these two companies for many years and I love to spread the word about quality, sustainable seed sources!

While the annual addition of fun and unique new varieties offer temptation in many forms (such as that new purple-striped beefsteak tomato, or a particularly fungus-free cucumber) what really draws me in are all the stories and valuable growing information peppered in with the products. Below I have listed a few of my favorite places to get free seed catalogs so you can enjoy them too!

Baker Creek (Rare Seeds)

Baker Creek, the leader in quality rare and heirloom seed selection, offers two different versions of their catalog; the free edition is the one I get every year and while I’ve never paid for the whole seed catalog, I’ve never been disappointed by the smaller counterpart. It’s chock full of gorgeous, high resolution photos of their unique and exotic varieties. As I’ve mentioned before I always find Baker Creek’s lack of growing information a little bothersome; however, I will continue to peruse their catalog and make small orders from them for years to come, I’m sure.

Botanical Interests

Another fan favorite, Botanical Interests is a serving of eye candy similar to Baker Creek but in a much more artistic way: each variety is hand-illustrated and they take great pride in including copious amounts of growing information. Kevin over at Epic Gardening has just acquired this company and I’m excited to see the direction he takes it.

Johnny’s

I hardly ever order from Johnny’s because I grow exclusively heirloom varieties, and they are a company that focuses a lot on new and developing hybrid types; however, I do use them if I am looking for something very specific. I also am continuously impressed with the amount of useful growing information they pack into their catalog and in their online grower’s library as well.

Seed Savers Exchange

SSE is my favorite publication for light reading. They always include touching ancestral stories of seeds from the catalog as well as from the vault that are fascinating and enjoyable to read, and they even sprinkle in recipes throughout! Their mission is a valuable one to support and their selection of exclusively heirloom seeds can’t be beat.

Territorial Seed Company

My grandpa told me about Territorial a few years ago and since then I have made purchases from them here and there. I really enjoy thumbing through their newsprint catalog with oldschool feel and loads of fabulous growing info.

Chances are that after you get on some of these lists (or order from gardening suppliers, who knows) you will receive catalogs in the future that you haven’t even requested! I found one of my favorite seed companies, Pinetree Garden Seeds, this way. And that’s not a sponsored statement whatsoever!

For some quick info on how to start those garden seeds, see my post category on seed starting.

Do you have any favorite seed catalogs not listed here? Share them with me in the comments below!

How I Organize my Garden Seeds

Welcome (or welcome back) to the cabin! I’m sitting down with a cup of tea and my seed purchases for the 2023 season to chat with you about what I’m most excited to grow this year as well as how I organize my seed stash.

Welcome (or welcome back) to the cabin! I’m sitting down with a cup of tea and my seed purchases for the 2023 season to chat with you about what I’m most excited to grow this year as well as how I organize my seed stash.

I did do some hapless department store seed shopping, but this year I tried to stick to only what I needed to round out my vegetable garden as well as selecting some flowers to transform my patch into the cottage-inspired space I’d like it to be. The larger ticket items I was in need of this year were alliums, paste tomatoes, greens, and herbs. I went through a lot of these seeds in prior years and I needed to round out my stock for this year not just for my personal garden but for the seedlings that I sell around town in the spring.

I shop mainly for heirloom vegetable seeds, and I would love if you would visit our Affiliations page to see which brands we use and love here on the homestead, and which give back to us through referrals!

Photo Storage Full-Size Seed Organizer:

https://amzn.to/3RgD92k


Photo Storage Half-Size Seed Boxes:

https://amzn.to/3Hi4P2w


Renee’s Garden Seeds:

https://sh2543.ositracker.com/206935/9151


Seeds ‘n Such:

https://seedsnsuch.com/


Seed Savers Exchange:

https://www.seedsavers.org/


MIGardener:

https://migardener.com/


SeedsNow:

https://www.seedsnow.com/?rfsn=5219015.ebfb4b

You can get 10% off your order using my code SAVE10NOW.


Sandhill Preservation Center:

https://www.sandhillpreservation.com/seeds-more-info


Baker Creek Rare Seeds:

https://www.rareseeds.com/


Breed Your Own Vegetable Varieties by Carol Deppe:

https://amzn.to/3WJtSB6


STRATCO Raised Garden Beds:

https://amzn.to/3wIbLRo


As an Amazon Associate I may earn a small commission from any purchase made from links that I share, at no additional cost to you. To find out more please view our privacy policy on our website.

Hearty Sourdough Multigrain Bread – Recipe

Do you love the sweet and nutty chewiness of a whole wheat loaf of bread, but want to leaven it with sourdough? Look no further. While I use a homemade seed mix, Bob’s Red Mill makes a nut & seed mix that can be added to any bread recipe for a hearty dose of heart-healthy grains and seeds

As you all know, my lovely readers, I have been on a sourdough binge. It’s been over a year since we’ve purchased ANY store-bought bread products and I’m very proud of this fact! I didn’t have any kind of agenda when it came to ditching commercial bread products but I am very happy to be able to provide my family with whole grain, home-cooked fresh bread every week. Cooking is something I’ve been passionate about since a young age, and as a natural progression of moving back to the country (and into my role as a full-time parent) nutrition has become a large focus in my daily life. As an added benefit, cooking from scratch is and always will be more affordable than purchasing pre-prepared food, and in this time of drastically increased cost of living it’s the least I can do as a stay-at-home mom to help lessen the burden on my hardworking husband’s income. I have the time, the energy and the sourdough starter, so why not?

I have been on such a mission to make EVERYTHING leavened with sourdough that the last time I went to bake a loaf deliciously seedy multigrain bread I discovered my commercial yeast had gone bad! After dozens of loaves of bread coming out of the oven perfectly baked, hugely risen and delightfully fluffy, I could hardly believe my eyes – a failure?? I had mixed up a generous 1.5lb loaf of bread, greatly looking forward to enjoying it, and after being left for hours to rise it showed absolutely no activity. So the last of my languishing granulated yeast went in the compost and I’m not even sad about it. With my sourdough starter hanging around day and night I thought there’s no reason I can’t use it to make a delicious, multigrain nut & seed bread. Right?

As is the trend of late, after searching online for a sourdough recipe that incorporated the traditional components of a whole wheat seed and nut bread but used a starter (and added no additional yeast) I came up empty-handed – or rather, perhaps a little dissatisfied with the few results I did find. So, as per usual, I took to the kitchen to concoct a recipe of my own.

I had already developed my own recipe for a yeast honey wheat bread and the included seed and grains mix, so I had a thought: why couldn’t I incorporate that into a sourdough-leavened loaf?

After just one prototype I have produced what my husband believes to be the perfect loaf of bread: it’s dense and chewy as a whole wheat multigrain bread should be, with the crispy, perfectly crunchy exterior characteristic of a classic loaf of sourdough. But don’t take his word for it – try for yourself and see what you think. I would love to hear your about your results in the comments.

Lavender: The Complete Growing Guide

Lavender is a hardy perennial herb renowned for its aromatic blooms and soothing medicinal qualities. Popular with pollinators and astoundingly deer-proof, this classical, compact shrub is a fabulous choice for low-maintenance landscaping or beautifying a kitchen garden. Dating back to the Old World and being native to the Mediterranean, lavender is drought-tolerant, easy to grow and thrives in poor soil conditions as long as it has good drainage.

Scientific Name:Lavandula angustifolia
Hardiness:Hardy perennial Zones 5-10
Spread:12”-36” tall by 12”-24” wide
Spacing:12”-36”
Light Requirements:Full sun, 6-8 hours
Soil Requirements:pH between 6.5-7.5; prefers dry, sandy, or well-draining soil; even barren or alkaline
Days to Maturity:18-23 weeks (126-160 days) after germination
Start Indoors:10-12 weeks before last frost
Germination:14-21 days at 70°F
Direct Sow:Not Recommended
Succession Plant:Not Recommended
Difficulty Level:Easy
Lavender Gardening Facts
English Lavender

About Plant

Lavender is a hardy perennial herb renowned for its aromatic blooms and soothing medicinal qualities. Popular with pollinators and astoundingly deer-proof, this classical, compact shrub is a fabulous choice for low-maintenance landscaping or beautifying a kitchen garden. Dating back to the Old World and being native to the Mediterranean, lavender is drought-tolerant, easy to grow and thrives in poor soil conditions as long as it has good drainage.

Popular Varieties

Lady Lavender – classic and beautiful
Munstead Lavender – hardy and easy to find
Ellagance Lavender – uniquely shaped, highly fragrant blooms

Sowing

Transplant (recommended): Germinate on damp paper towels (moist stratify) in the fridge for about 4-6 weeks; or surface sow seeds in a flat 10-12 weeks before last frost. Seeds require some light for germination, so press lightly into the soil or cover thinly with vermiculite. Transplant to individual cells when two sets of true leaves have emerged. Direct seeding is not recommended.

Propagating/Transplanting

Transplant started plants in spring after the last frost. Plant shallowly, so the soil line is just above the top roots of the plant. Space plants 12-18″ apart in rows 24-36″ apart.
Lavender can be easily propagated from cuttings. Take softwood cuttings no less than 3” long, and remove leaves from two lower nodes on the stem. Stripping the stem on one side can also aid in root development. If desired, dip in rooting hormone or honey and bury the bottom portion in moistened potting soil in a small container. Cover with a humidity dome or plastic bottle and place somewhere warm with ample light exposure. When you can see root development, remove the plastic cover and put the pot into a location with full sun. Transplant after about a month of outdoor growth.

Growing

Plant in a loose, well-drained, gravelly or sandy soil. Lavender favors a protected south-facing location. Soil that is slightly acidic to slightly alkaline is most desirable. If the soil pH falls below 6.5, the soil should be amended to adjust the pH to no more than 8.3.

Harvesting

During the second year, cuttings can be taken from August-November, when the stems are semihardened, but before they have been subjected to a hard freeze. Harvest the flower spikes on a dry, warm, sunny day just as the flowers are about to open. Hang to dry in a well-ventilated space out of direct sunlight.

Aftercare

In late fall, clip plants back to below the flower stems and mulch heavily.

Sissy’s Notes

Season 2019:
Attempted to germinate in plastic cups with little success. Maybe one or two sprouts that died off shortly after germination most likely due to damping off.

Season 2021:
Tried cold stratifying on paper towels in the fridge, had about 30% germination. These seedlings died after transplanting as well, I believe from damping off. Need to isolate lavender from other seedlings in flats that don’t get as much water.

Season 2023:
Tried two different germination methods: broadcast sown in 4×4 flats, half covered with a thin layer of vermiculite and half just pressed into the soil; and spread on moist paper towels and taped to a south-facing window and left for 4 weeks.

Sparse germination in the flats of Livingston and Burpee seeds; 50% germination of Baker Creek seeds. I do not know whether these brands have been cold stratified prior to packaging and have not been able to find out.

Best germination was achieved in the window baggies – close to if not 100% of the two types from Baker Creek. Saw better germination of the department store brands but not much, and not enough to transplant. I suspect the differences stem from stratification prior to packaging. I’ve placed a few more packets of Livingston and Renee’s Garden lavender seeds into a baggie to dry stratify in the fridge, and will try again on paper towels. Transplanted the baggie seedlings to individual cells and they’re putting on good growth.

The Lazy Girl’s Guide to Sourdough

This is a perfect way to maintain your sourdough starter without it taking over your life! It spends most of the time in the fridge in a small jar, but it always available if you need it. When baking with it always remember to reserve at least 50 grams of starter to keep it going.

I’ve referenced in some of my other sourdough posts that I think it’s a process that’s been way over-complicated! I get great results with my half-assed, hair-brained efforts as a toddler mom with little time (and short-term memory) to spare.

Here I will run through a very basic long-term care routine for your sourdough and how to use it to bake a perfect loaf of bread maybe once a week, and less often than that if needed.

First, you’ll need a good sourdough starter. You can get some from a family member, a friend, or even an online marketplace! Sourdough is having quite the renaissance in the home kitchen so now is a good time to source some starter. You can even freeze it and keep it on hand for emergencies (this is how I made it through the post-partum period without killing my two-year-old culture!)

Second, you’ll need to make sure your starter is nice and active before putting it into hibernation, as I like to call it. This can be a few days or up to a few weeks of time it’s spending on vacation in the fridge.

Third you need to find an appropriate container. A pint Mason jar may be appropriate, or you may need a larger amount of starter depending on the amount of baking you’ll be doing. I like to use this jar from WalMart, but unless you’re baking at least weekly, and making more than just one loaf of bread (perhaps cinnamon rolls, or English muffins?) it’s not worth the fridge space.

Then, all you’ll need to do is pull the jar out of the fridge before baking day, split it into two portions, and feed them both: one portion will go back into the fridge for later use and the other will be used in your baking for that day.

You always have to have a portion of starter to continue its legacy, so don’t ever use it all up! You’ll have to get or make more if you do.

Below you’ll find the feeding schedule as well as a simple recipe for a rustic loaf of sourdough bread, perfect for the first-time baker. Be sure to check out my other sourdough recipes as well.

Garden Minestrone – Recipe

I can say without an ounce of trepidation that this batch of minestrone soup is the BEST we have ever tasted! I have made gallons of it, and the pot is always scraped clean by the night’s end. It comes together quickly and easily, and pairs amazingly with a side salad or even just some fresh homemade bread.

I can say without an ounce of trepidation that this batch of minestrone soup is the BEST we have ever tasted! I have made gallons of it, and the pot is always scraped clean by the night’s end. It comes together quickly and easily, and pairs amazingly with a side salad or even just some fresh homemade bread.

I would really like to try pressure canning this base recipe for shelf-stable storage. For that you’d have to omit the pasta and add it back in when reheating the canned soup ingredients. Keep an eye out for that post because it’s on my to-do list!

So without further ado, go forth and make soup, my friends. ‘Tis the season!

Homestead Diary: Making Yogurt At Home in The InstantPot

But now that I’ve started making my own yogurt at home I have cut our overall dairy cost by over half, even though I’m paying twice as much for milk – and in my mind that’s an investment worth making. A two week supply of yogurt now costs us $7 instead of $50 and it requires minimal work on my part! And can you really put a price on the quality of homemade food? I sure can’t.

Delicious homemade raw milk yogurt

So far – at least for our family – the 2020’s have been a weird time. With the cost of living on a steady uptick and the stability of our economy at a tipping point it’s easy to live in fear of the future. Rather than panic and stockpile food and supplies I have really focused on honing my sufficiency skills: cooking, baking, canning, and just overall cutting costs and practicing frugality wherever I can. One of the things I’ve been able to cut out of our grocery bill completely is baked goods (I am ridiculously proud to say that we haven’t bought bread from the supermarket in almost a year!) but what we still spend a ridiculous amount of money on each month is dairy products.

I’ve recently transitioned our family to locally sourced raw milk, an investment in our health and our community that I’m very proud of. However, when you’re looking at the cost of this type of high quality produce, it can be quite a shock initially. We pay nearly twice as much for the milk and cream we get from a local farm. However, I am completely willing to pay the price for this product and its superior quality. Another way that I’m able to offset this cost is to make good use of this produce and that includes making more of my own dairy products at home. What’s most surprising is how easy it is to get started!

I store our yogurt in half pint mason jars with reusable lids

As a whole, we consume an almost unacceptable amount of yogurt. My husband will usually have one to two store bought cups of yogurt a day; my son has one to himself each morning; and I will also have a healthy amount with granola for my breakfast. Altogether that totals up to $100 a month JUST on yogurt. Now that I’ve just put that on the internet for everyone to see, it’s a tad embarrassing….

But now that I’ve started making my own yogurt at home I have cut our overall dairy cost by over half, even though I’m paying twice as much for milk – and in my mind that’s an investment worth making. A two week supply of yogurt now costs us $7 instead of $50 and it requires minimal work on my part! And can you really put a price on the quality of homemade food? I sure can’t.

All you need to effortlessly make your own yogurt at home is a cup of plain yogurt to start your culture, a gallon of milk, and an InstantPot.

Yogurt is made by culturing specific bacteria in the ideal environment to the desired taste and texture. It is very similar to other popular fermenting projects, such as kombucha or sourdough; the longer it cultures, the more sour it becomes. Based on my research the minimum cook time for most cultures is 8 hours, all the way up to 24. I prefer to ferment our yogurt for 16 hours, a perfect amount of time to prep the night before I want to prepare a batch for weekly use. This produces a texture much like Greek yogurt after it has been strained.

Now, a strainer is an optional investment but they are very affordable and well worth the effort in my opinion. The first batch I made I had attempted to strain through a muslin cheesecloth and it was very inconvenient as well as messy. I have had a Graham Kerr yogurt strainer for a couple of years even before I started making my own yogurt and it has been absolutely necessary to achieve a high quality finished product.

The addition of a strainer will bring your homemade yogurt to the next level

Flavorings are optional and up to personal discretion. So far I have put just a dab of homemade jam in the bottom of each jar and have had fabulous results. It’s very affordable to forage for berries and fruit and turn them into flavorings to try in your homemade yogurt. We have also tried honey vanilla and maple syrup, both of which have also been well-received.

When your yogurt has finished, whether you strain the whey out or not, you can store it in individual containers for portable snacking or in a large tub in the fridge for easy access. I use yogurt in some of my favorite recipes as well so it never goes to waste in our house. I have read over and over of the health benefits of whey, but I don’t make breakfast smoothies, which is its most popular use; mostly we just give it to the chickens who absolutely love it. You can leave it in a container for your livestock to drink or add it to something like grain or cereal for a quick, high-energy snack (especially good during the winter months!).

Amazing!

See my recipe below for specific instructions on how to start making your own yogurt. I promise it will be well worth the small effort it takes to make such a wonderful product!

Rosemary Olive Oil Sourdough – Recipe

In my quest to find a traditional sourdough recipe for this type of bread, I found two things to be true: it is typically made with olive oil, something that I’m not as experienced with in sourdough; and the rosemary is either added to the olive oil to impart flavor, or the dried herb is chopped and added to the dough – but NEVER both. So, in typical fashion, I decided to put my own twist on the traditional and do the rosemary flavoring a little differently.

Rosemary Olive Oil Sourdough

The most recent experimentation on my sourdough journey has been adding herbs and other inclusions to my bread. While I love a simple sourdough boule I wanted to spice up my loaves with interesting flavors and textures.

When I was a teenager we used to live near a local supermarket that was on the more “crunchy” side. Their bakery produced an artisan loaf of rosemary bread that was an absolute delicacy. Perfect with every meal, it was commonplace in our kitchen in its printed brown paper bag.

In my quest to find a traditional sourdough recipe for this type of bread, I found two things to be true: it is typically made with olive oil, something that I’m not as experienced with in sourdough; and the rosemary is either added to the olive oil to impart flavor, or the dried herb is chopped and added to the dough – but NEVER both. So, in typical fashion, I decided to put my own twist on the traditional and do the rosemary flavoring a little differently.

To begin, I harvested some rosemary fresh from the garden and added it to a pint jar of good quality olive oil to marinate for a few days. The smell, even after the first day, was absolutely heavenly! I kept checking the oil until it reached the desired saturation and then prepared my sourdough starter for baking the next day.

While researching the effect of adding oil to your sourdough bread I found a great video by FoodGeek:

And armed with hours of researched information I mixed up my very first loaf of rosemary olive oil sourdough.

As I said before I decided to flavor the bread with both infused oil and chopped herbs. However, instead of using dry rosemary, I pulled the sprigs I had marinated and removed the leaves from the stems to include in the dough. I chopped them pretty finely, but this would be up to personal preference. I was so happy with how this turned out for numerous reasons, the most important being the texture of the rosemary itself. Oftentimes when baking with rosemary it can be tough or sharp on the palette; but after soaking up all that olive oil it was the perfect consistency.

I make sourdough the no-fuss way: combine all ingredients, stretch and fold a few times, leave for bulk fermentation and then bake. The biggest issue I’m still having with my bakes is scoring high hydration dough. If I try to do any kind of scoring that isn’t extremely simple, I don’t get good results. However, just an expansion score does fine, and I like the texture of a very wet dough so much more that I’m willing to sacrifice aesthetics.

The best baking tip that I’ve learned on my sourdough journey thus far is to leave the lid on the dutch oven for the entirety of the bake. While most artisan bread has a thick, crusty exterior, we prefer a soft, crispy crust. It’s easier for my toddler to eat, and I like to preserve the roof of my own mouth as well.

So while my scoring isn’t the most attractive this is by far the best sourdough product I’ve made. The olive oil keeps the crumb a bit tighter, but it’s unbelievably moist and had the most perfect flaky crust. It slices like a dream and is fabulous with pasta, as toast, or for sandwiches.

If you have a good, strong sourdough starter and some fresh rosemary available I highly recommend trying this recipe. We served it with spaghetti and a side salad and it was pure heaven!

Sourdough English Muffins – Recipe

Over the past year that I’ve spent honing my home baking I’ve come to one important conclusion:
Bread is not as complicated as it’s made out to be. This is especially true when it comes to sourdough!
I don’t feed my starter on a regular schedule, rather by what its reaction is to feeding; I don’t measure out exact quantities when I do feed my starter, but go by sight and feel; and I don’t know the hydration of my starter – nor does it matter to me. I just do what works in my home.

Square sourdough muffins

Over the past year that I’ve spent honing my home baking I’ve come to one important conclusion:

Bread is not as complicated as it’s made out to be. This is especially true when it comes to sourdough!

I don’t feed my starter on a regular schedule, rather by what its reaction is to feeding; I don’t measure out exact quantities when I do feed my starter, but go by sight and feel; and I don’t know the hydration of my starter – nor does it matter to me. I just do what works in my home.

Ripe sourdough starter

So after I made my first few batches of English muffins, which included kneading, resting, and punching down (if it included the addition of commercial yeast, the cardinal sin of sourdough baking if you ask me) my intuition got the best of me and I decided to take a more relaxed approach to muffin making: combine all ingredients, stretch & fold, and set aside for bulk ferment.

The results I get from this lazy-girl recipe are EXACTLY the same as the more labor-intensive method. In fact, I think they taste better when they’re allowed to rest and develop more gluten undisturbed by the general assault most people put on their bread dough. Just look at those nooks and crannies! And given time to rest, the sour flavor is unbelievably good.

Halved English muffin

Another thing I learned about myself through baking muffins is that I really don’t care what they look like, which translates directly to making square muffins rather than cutting round ones and wasting precious dough from around the edges. Photogenic? No. Still delicious? Absolutely.

I like to fry mine in olive oil in a cast iron skillet over low heat. If you have a lid for your skillet you can cook them to the perfect toastiness and still be thoroughly done on the inside. Just leave the lid on during cooking.

To successfully bake most of these no-knead sourdough recipes you’ll need a nice vigorous starter. I feed mine and leave it on the counter so I know it’s ready for baking. If you’re bringing yours out of hibernation, I suggest feeding it two to three times before baking.